
Glossary
Screenshot Editor
 ChatGPT
 Perplexity
 Gemini
 Claude
What is a screenshot editor?
A screenshot editor is a tool for modifying screenshots after they are captured. It helps people crop images, add arrows or boxes, label important areas, blur sensitive information, highlight interface details, and export screenshots for documentation or sharing.
For documentation teams, a screenshot editor turns raw screen evidence into clearer instructions, safer support handoffs, and more usable training material.1 The tool is only useful if it makes the next reader faster and less likely to misread the screen.
What a screenshot editor does
A screenshot editor sits between capture and publishing. First, someone captures the screen. Then they use the editor to remove irrelevant context, protect private details, and point the reader toward the important part of the image. Finally, the edited screenshot is added to a guide, SOP, ticket, help article, release note, or training asset.
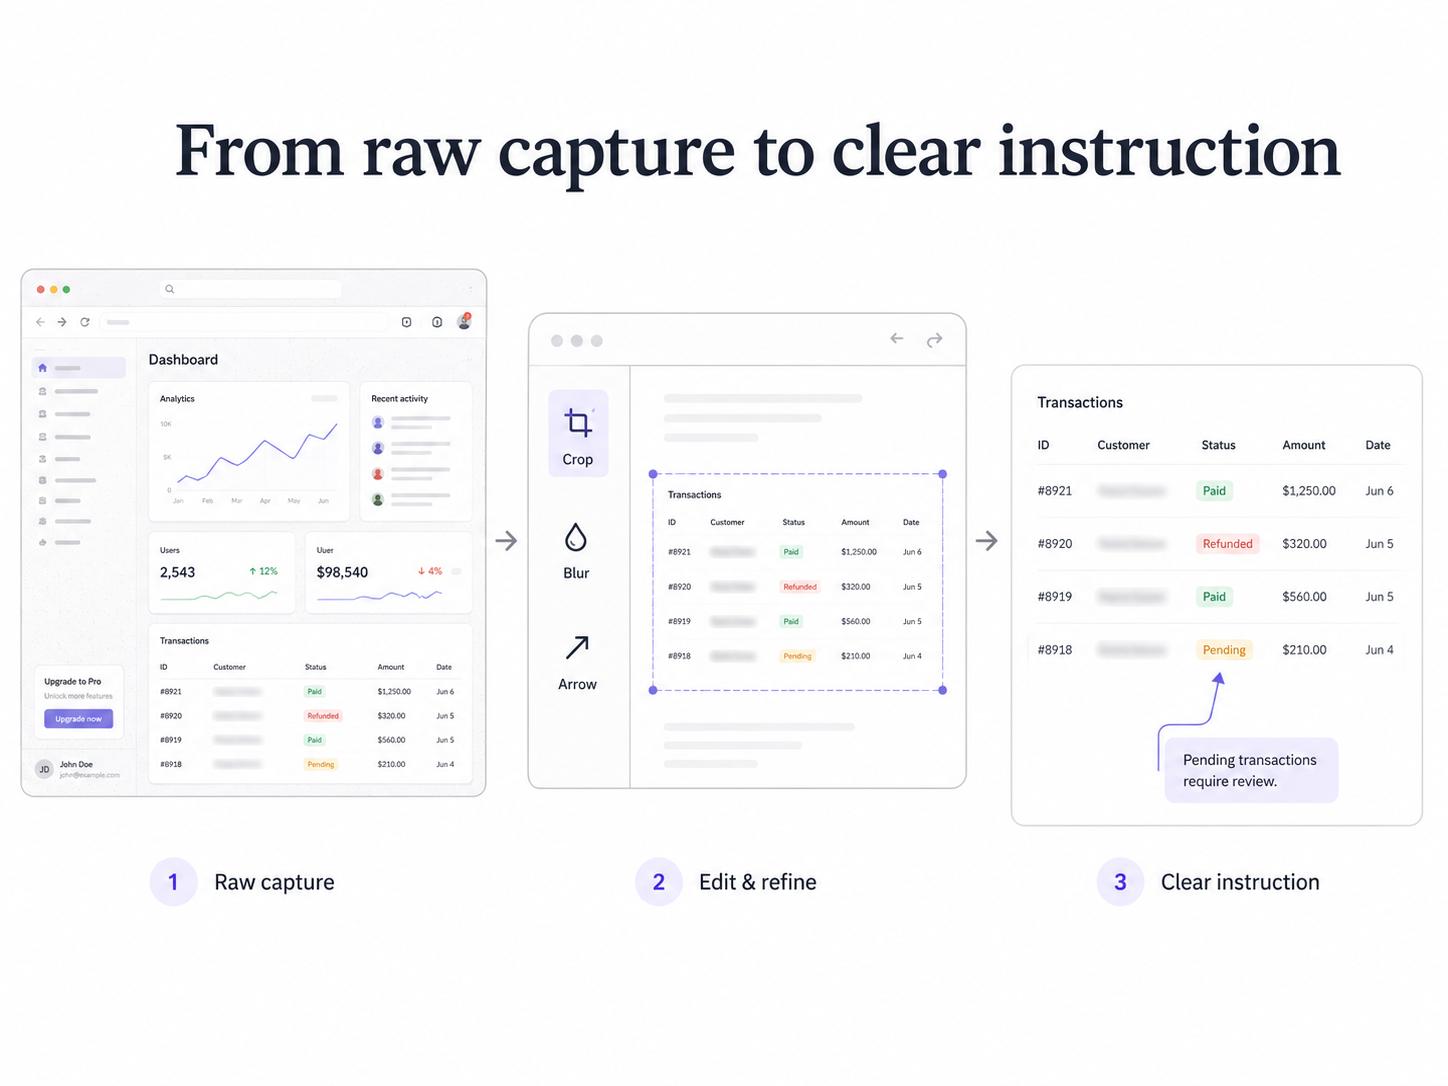
Common features include cropping, resizing, arrows, rectangles, labels, text overlays, numbered callouts, highlights, blur, redaction, export settings, and sometimes AI-assisted cleanup or object removal.
The best editors make common documentation edits fast. A support teammate should be able to capture, crop, blur, point, and share without opening a full design application. A training or enablement team may need more consistency: reusable callout styles, predictable exports, and a workflow that keeps images tied to the steps they explain.
When a screenshot editor is useful
Use a screenshot editor when a raw screenshot contains too much information, too little focus, or details that should not be shared. This is common in software documentation because product screens often contain navigation, account data, customer names, internal URLs, browser chrome, and repeated controls.
A screenshot editor is useful when you need to:
- Point to the exact button, field, menu, or setting a reader should use
- Crop a large screen down to the relevant workflow step
- Hide customer, employee, financial, or internal information
- Show a product bug or incorrect UI state without extra explanation
- Add numbered markers that match written instructions2
- Standardize images across a guide, SOP, or knowledge base article
If an edit mainly makes the image busier, it is probably not helping.
Features that matter for documentation
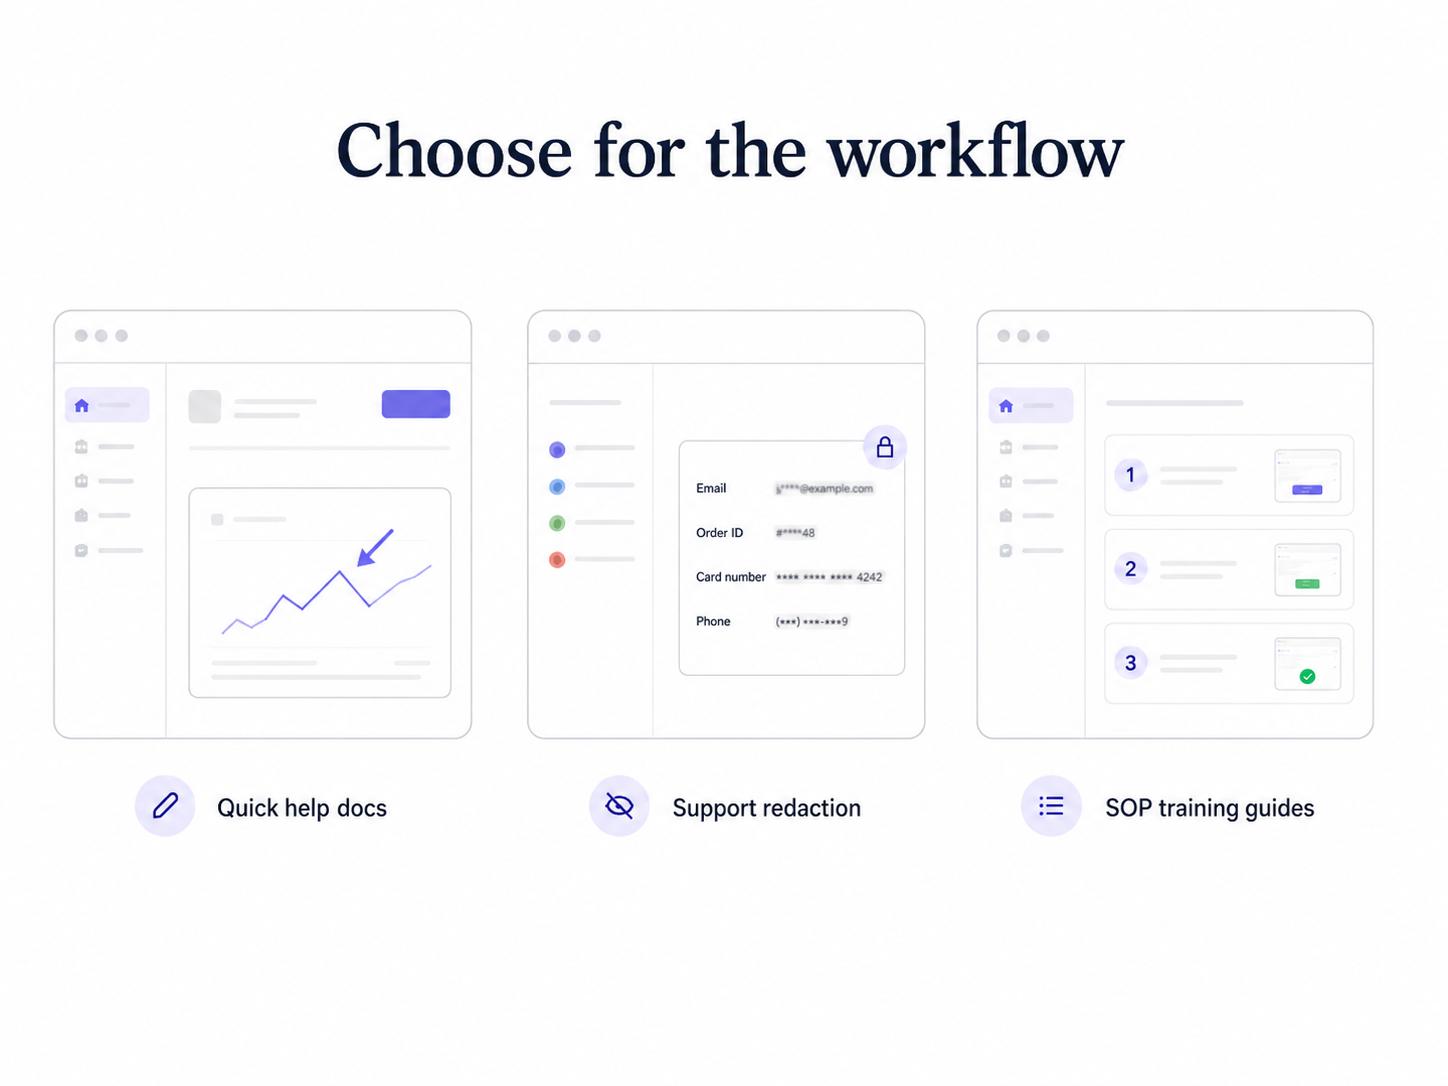
For SOPs, support, onboarding, and training, the strongest screenshot editor features are plain but important: fast crop, reliable blur, readable callouts, consistent styling, and easy export.
Speed matters because visual documentation is often created in the middle of real work. If editing a screenshot breaks the flow, people will skip the edit or share messy screenshots. Consistency matters because readers learn the visual language of a guide. If arrows, labels, and step markers change style every few images, the guide feels harder to follow.
Privacy matters most. Screenshots can accidentally expose names, emails, account IDs, API keys, internal URLs, pricing, patient details, student data, payroll data, or customer records.3 A useful screenshot editor should make it obvious how to blur or remove sensitive information before the image is sent, published, or uploaded.
How to choose a screenshot editor
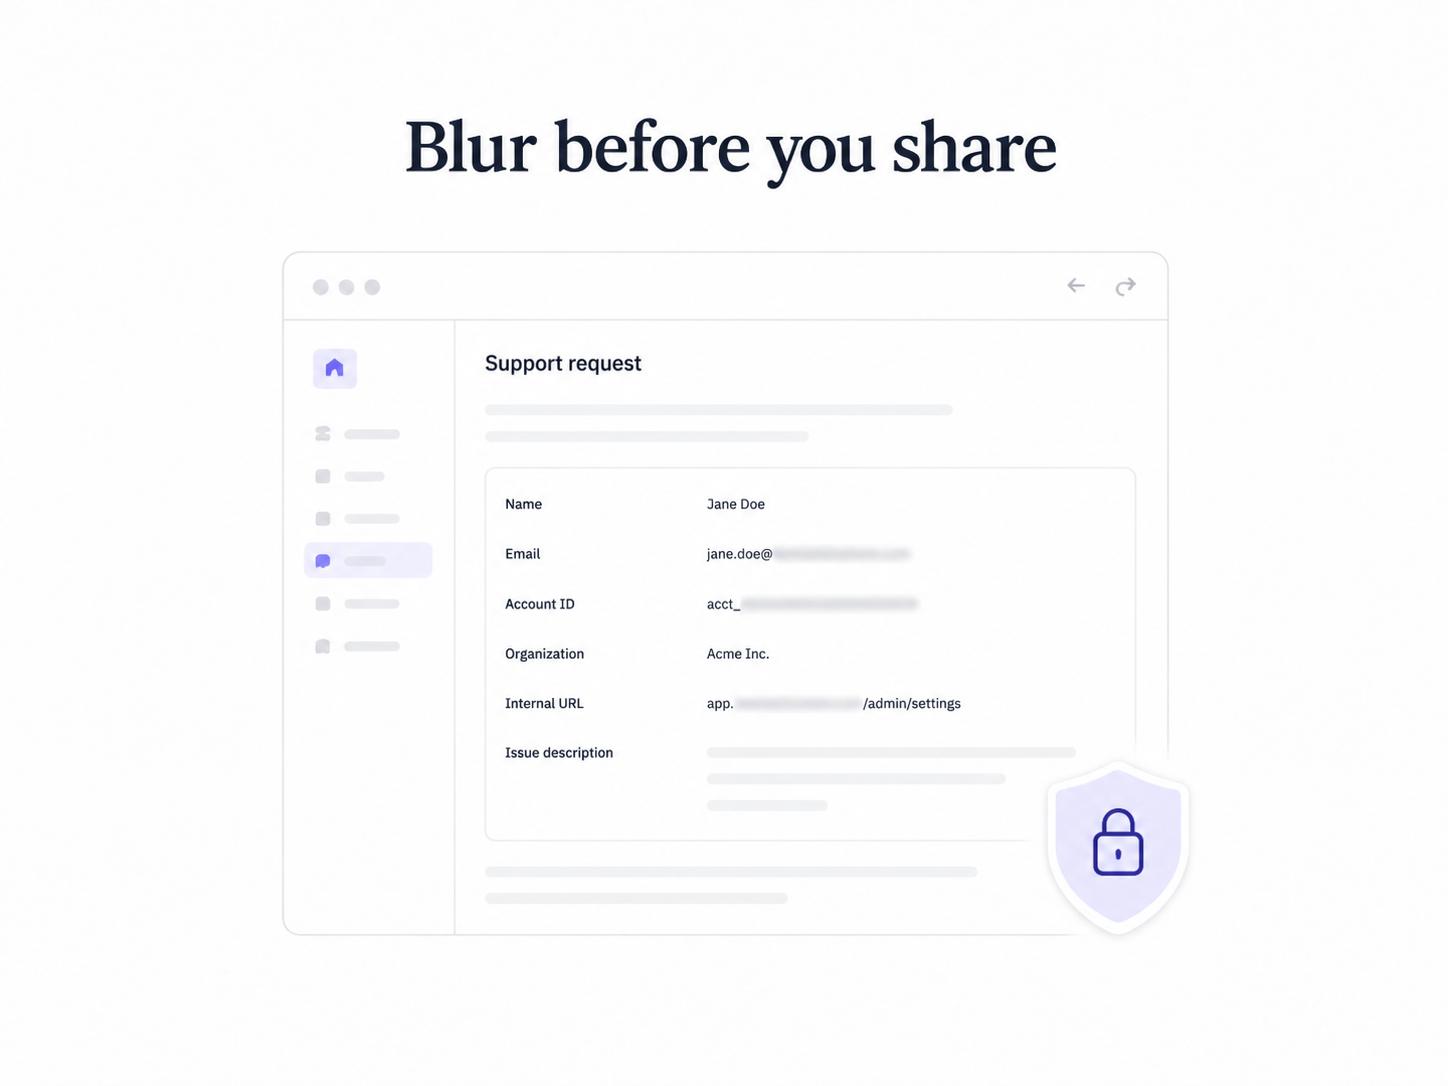
Choose the editor based on the workflow, not the longest feature list. A solo founder writing help docs may need speed and simple markup. A support team may need redaction, ticket integration, and fast sharing. An operations team documenting SOPs may need repeatable styles, multi-step guide support, and easy updates when the process changes.
A practical selection rule is: choose the tool that reduces the distance between seeing a workflow and explaining it clearly. If the editor creates extra cleanup work, requires manual asset management, or makes updates painful, the team will drift back to unedited screenshots and informal explanations.
Also consider maintainability. A heavily edited screenshot may look great today but become inaccurate when the product UI changes. Favor clear, simple edits that are easy to recreate.
Common mistakes
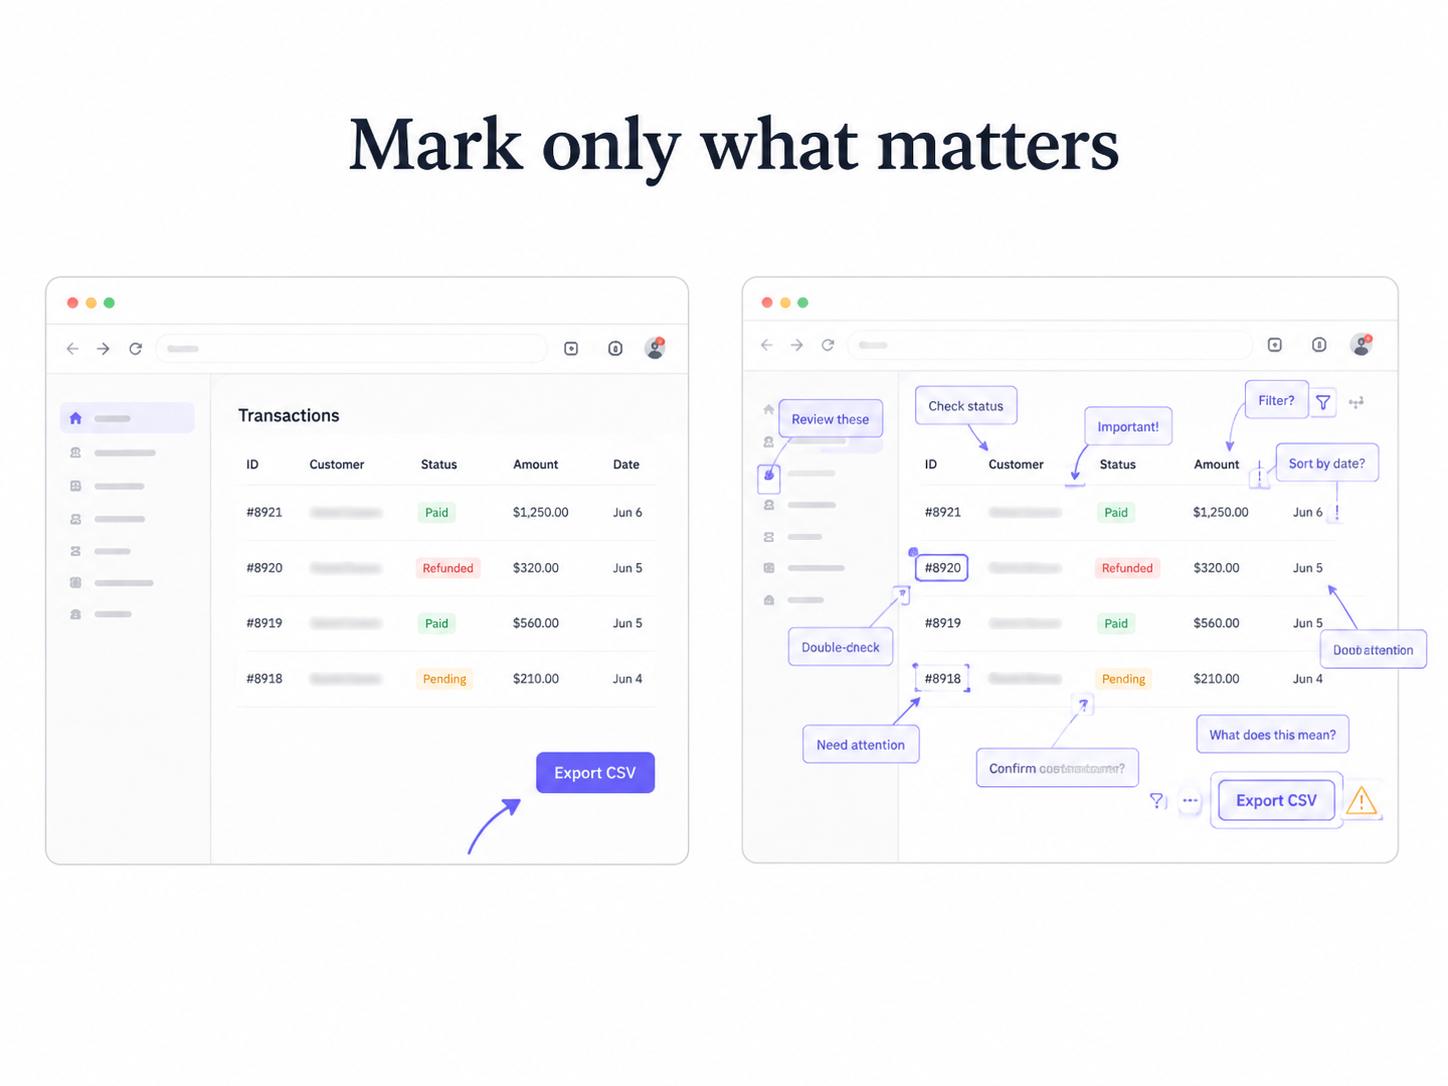
The first mistake is over-editing. Arrows, boxes, labels, highlights, and blur can all be useful, but stacking them on every screenshot makes the image harder to read. Mark only the decision point or evidence the reader needs.
The second mistake is using screenshots as a substitute for written instructions. Screenshots are hard to search, translate, skim, and keep accessible.4 The written step should still explain what to do; the screenshot should confirm where to do it.
The third mistake is treating blur as an afterthought. Sensitive data should be removed before a screenshot circulates in a ticket, Slack thread, help center draft, or training deck. Once an unredacted screenshot is shared broadly, the workflow has already failed.
How Trails helps
Trails helps teams capture workflows as they happen and turn them into polished step-by-step guides. That reduces the amount of manual screenshot editing required because each captured visual is already connected to a process step. Trails can also create an AI-narrated video version for training or sharing.
For teams building SOPs, onboarding guides, support docs, or internal training, that means less time assembling static screenshots and more time making the workflow itself clear.
Sources
- 1
Nielsen Norman Group. Visual Design in UX. Nielsen Norman Group. www.nngroup.com/articles/visual-design-in-ux-study-guide/. Accessed July 8, 2026.
- 2
Microsoft. Lists. Microsoft Learn Style Guide. learn.microsoft.com/en-us/style-guide/scannable-content/lists. Accessed July 8, 2026.
- 3
National Institute of Standards and Technology. NIST Finalizes Updated Guidelines for Protecting Sensitive Information. NIST. www.nist.gov/news-events/news/2024/05/nist-finalizes-updated-guidelines-protecting-sensitive-information. Accessed July 8, 2026.
- 4
W3C Web Accessibility Initiative. Images of Text. W3C. www.w3.org/WAI/WCAG22/Understanding/images-of-text.html. Accessed July 8, 2026.